How to set up the Blvck Icons on Android?
Note: In this example, we are using a free app, so you can expect some ads whilst using the “ANY APP” application.
Your Android Phone theme will affect the size of the icons. If you want small icons, you have to download a theme that has a small icon.
-
Your files will be ready to download as soon as the payment is processed via email. As soon as you receive the email, make sure to download the files.
-
Head to settings, under the “Home Screen layout” tab choose “HOME AND APPS SCREENS” and hit apply button.

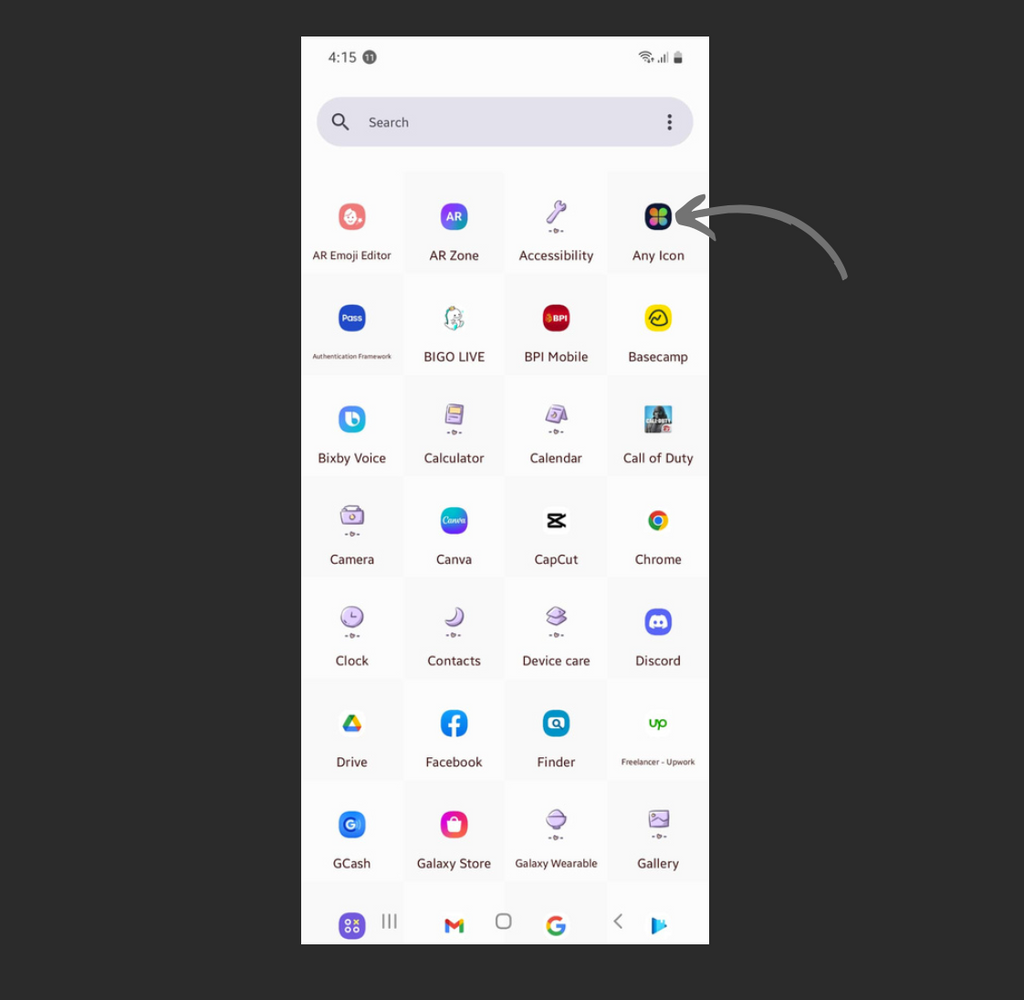
3. You can now start customizing your Homepage. Swipe up and Open the “ANY ICON” application.

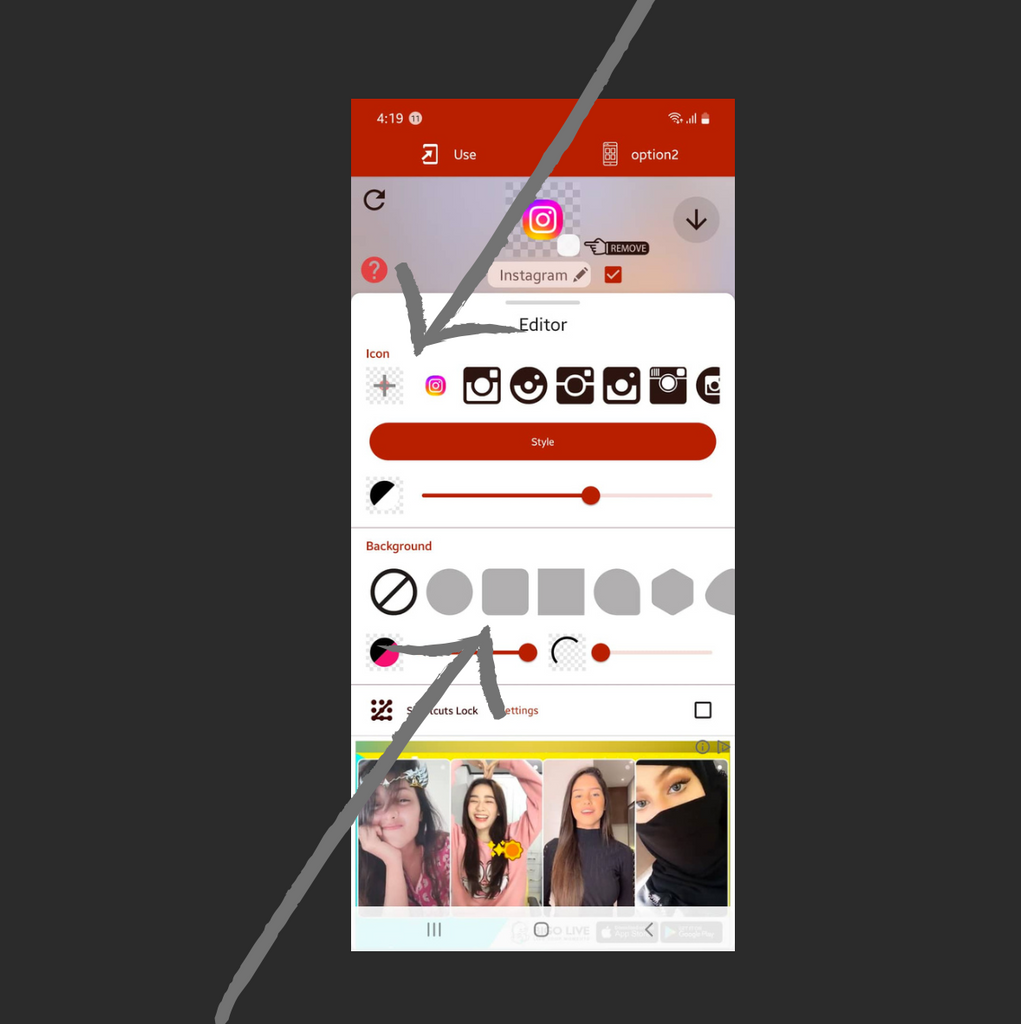
4. Select the Application you want to customize. In this example, we are using the app Instagram

5. You will see a + sign icon on the left side of the screen. Hit the + sign icon. You can also customize the shape of the icons

6. Pick the correct image for the application you want to customize.

7. Edit the image the way you prefer (You can put it in left, right, and center, or you can zoom in or out)

8. Finally, hit the “USE” button at the upper right side of the screen.

Repeat the same process to the other applications. Change your wallpaper for aesthetic looks.

Let's move on to the second part of this guide... How to set up Widgets?
Please note we used a third-party app called “Simple Photo Widget”. You can use any photo widget app you like. We are using a simple app for easy-to-use reference.
1. Open the Simple Photo Widget App

2. Click the (+) sign button
*you can watch a video tutorial on how to install different kinds of widget.

3. Hit the Add button

4. Click the edit button to customize the widget

5. Select the "Photos".

5. Choose the widget/images you like and then hit Select.

**You can customize your widget by cropping, rotating, adjust the opacity and border.
6. Hit the create button.


